Capturing receipts
Upload purchase invoices and receipts, drop them in by email or photograph them with your phone — and when a receipt counts for input VAT.
Last checked against the program: 09/10/2026
Three ways in
- Upload on the computer: Receipts → Add receipt.
- By email to your own receipt address — suppliers can send there too.
- With your phone via scan.invobookz.com: photograph, check, done.
Allowed are PDF, JPEG, PNG, HEIC and WebP, up to 10 MB per file. If a receipt is too long for one picture, choose several files — they become pages of one receipt, at most 6.
Enter a receipt by hand
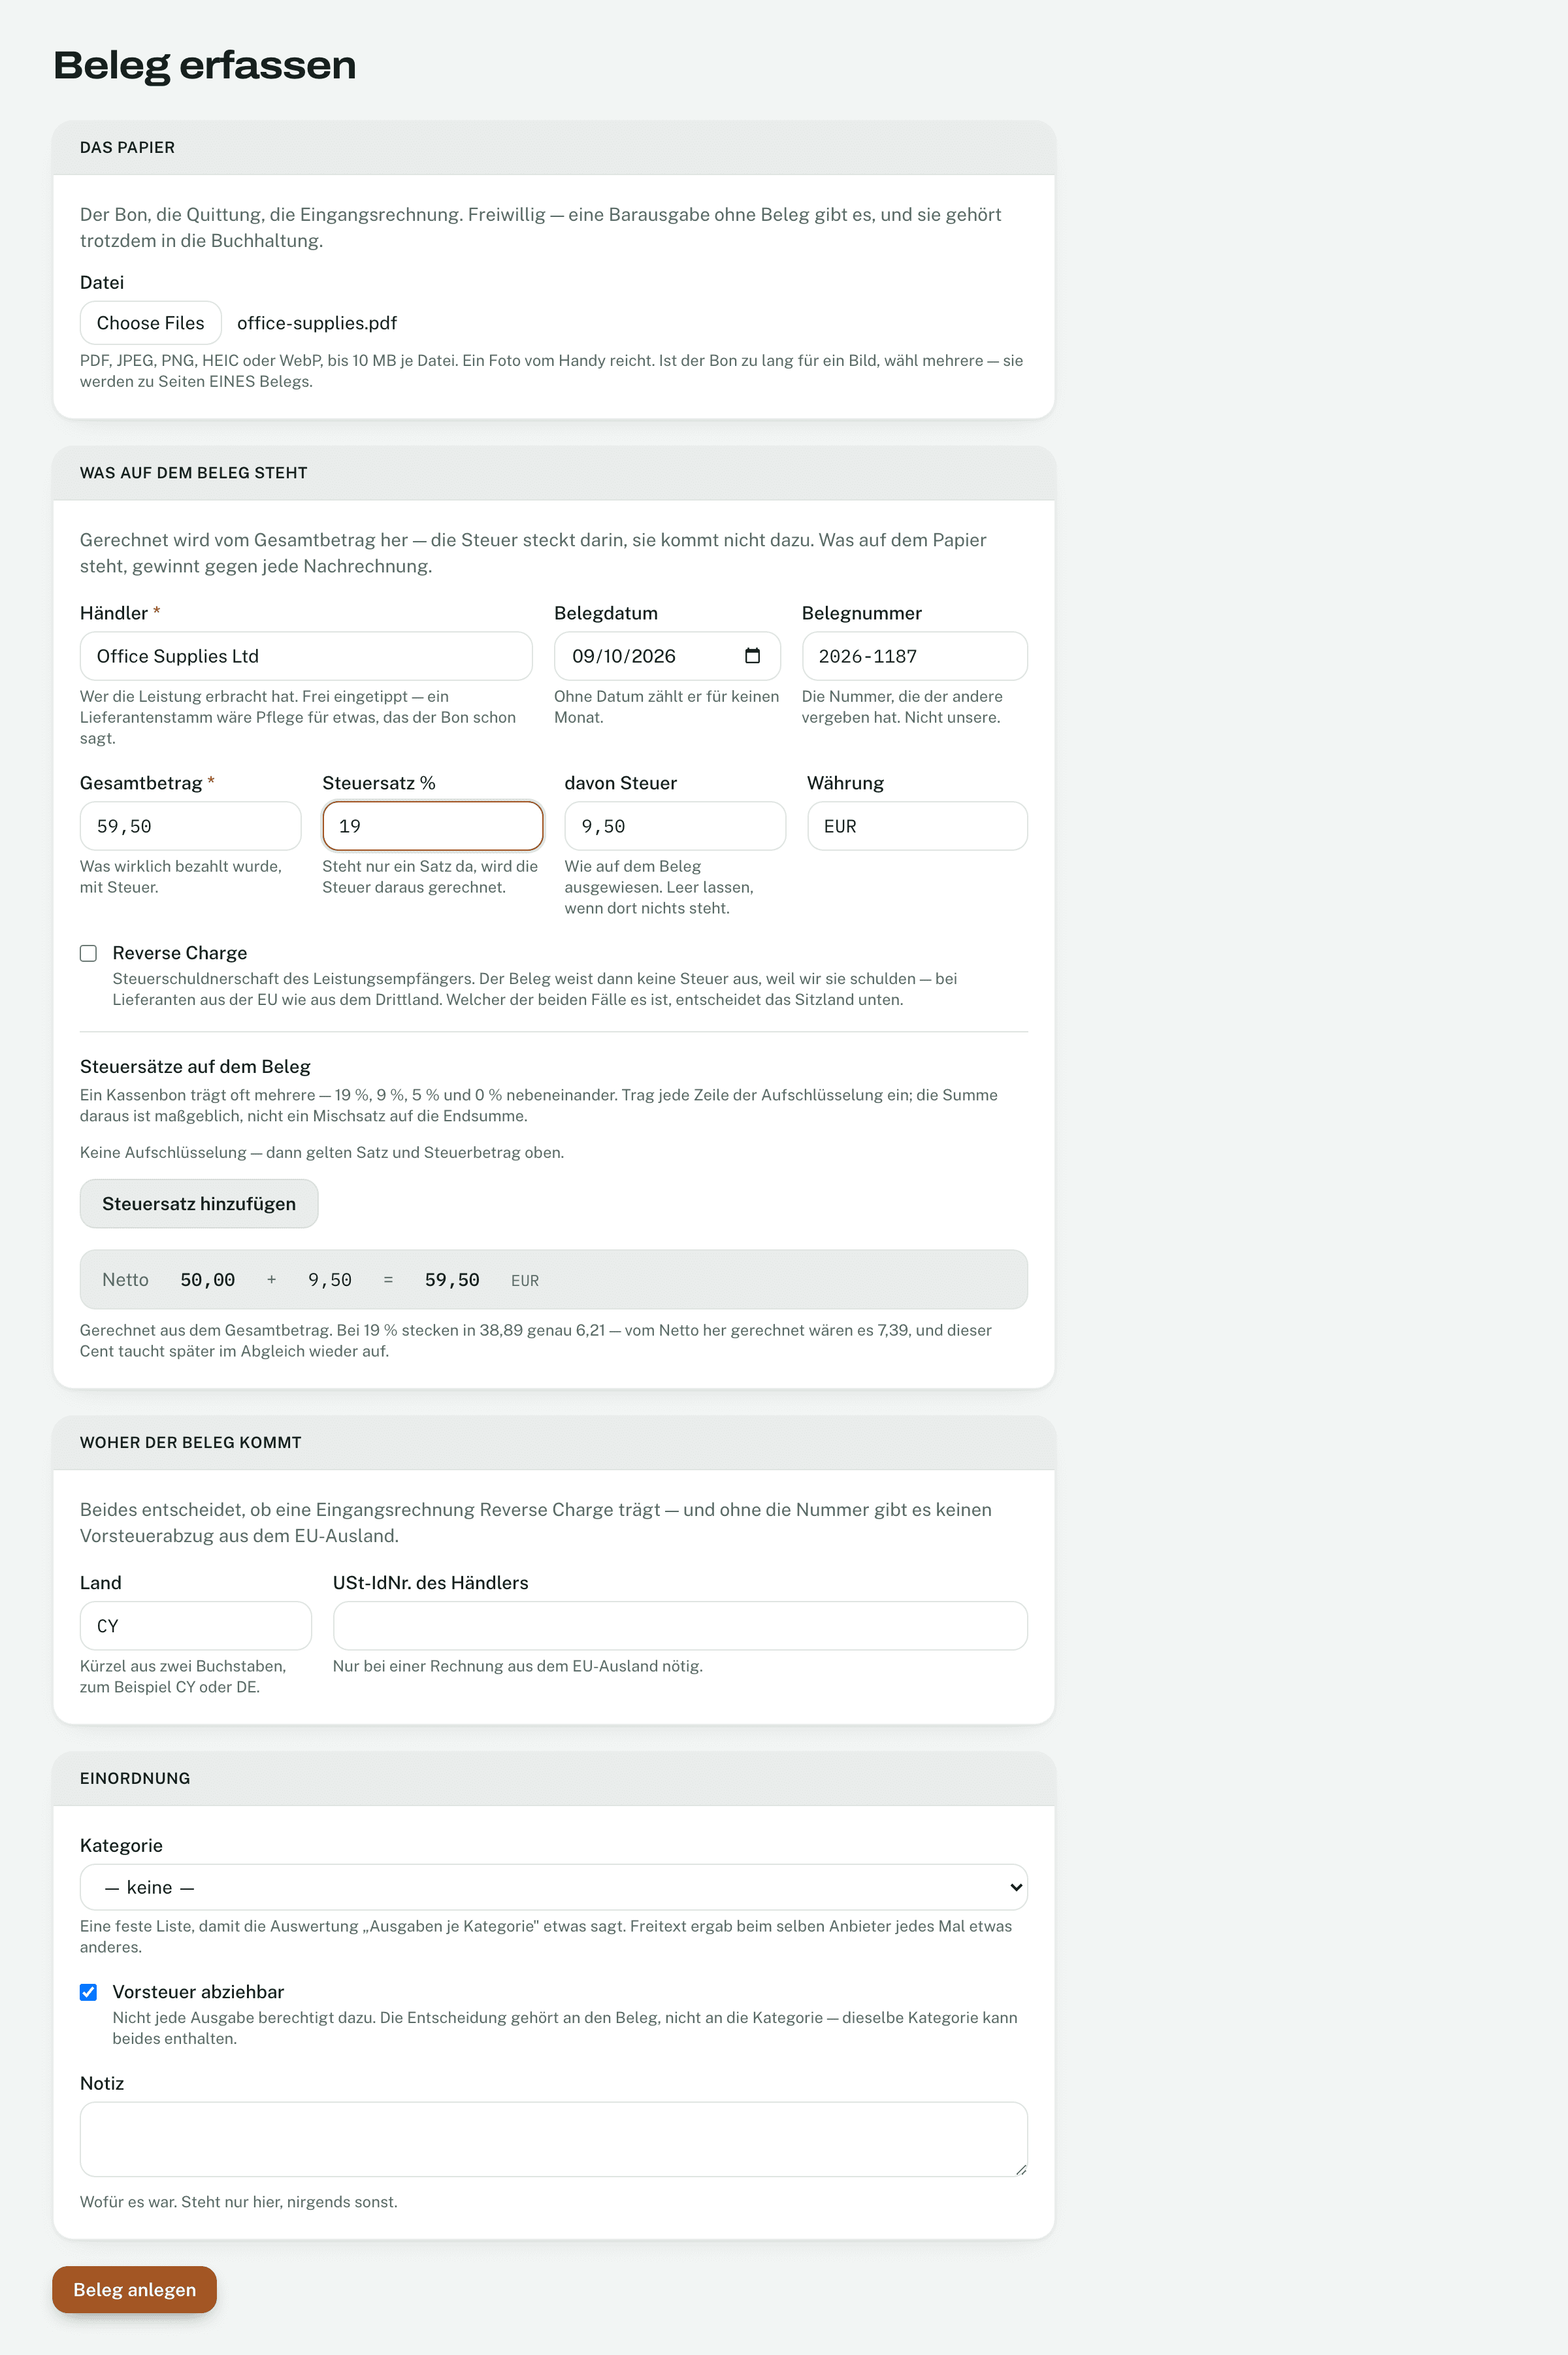
- Open Receipts and click Add receipt.
- Choose the file (optional — a cash expense without paper exists too).
- Enter merchant, receipt date, total, VAT rate % and of which VAT. Everything is calculated from the total: the VAT is inside it, not added on top.
- For several VAT rates on one receipt: Add VAT rate and enter each line of the breakdown.
- Country and merchant’s VAT number matter for invoices from other EU countries (reverse charge, input VAT).
- Click Create receipt.
Confirm — only then does it count
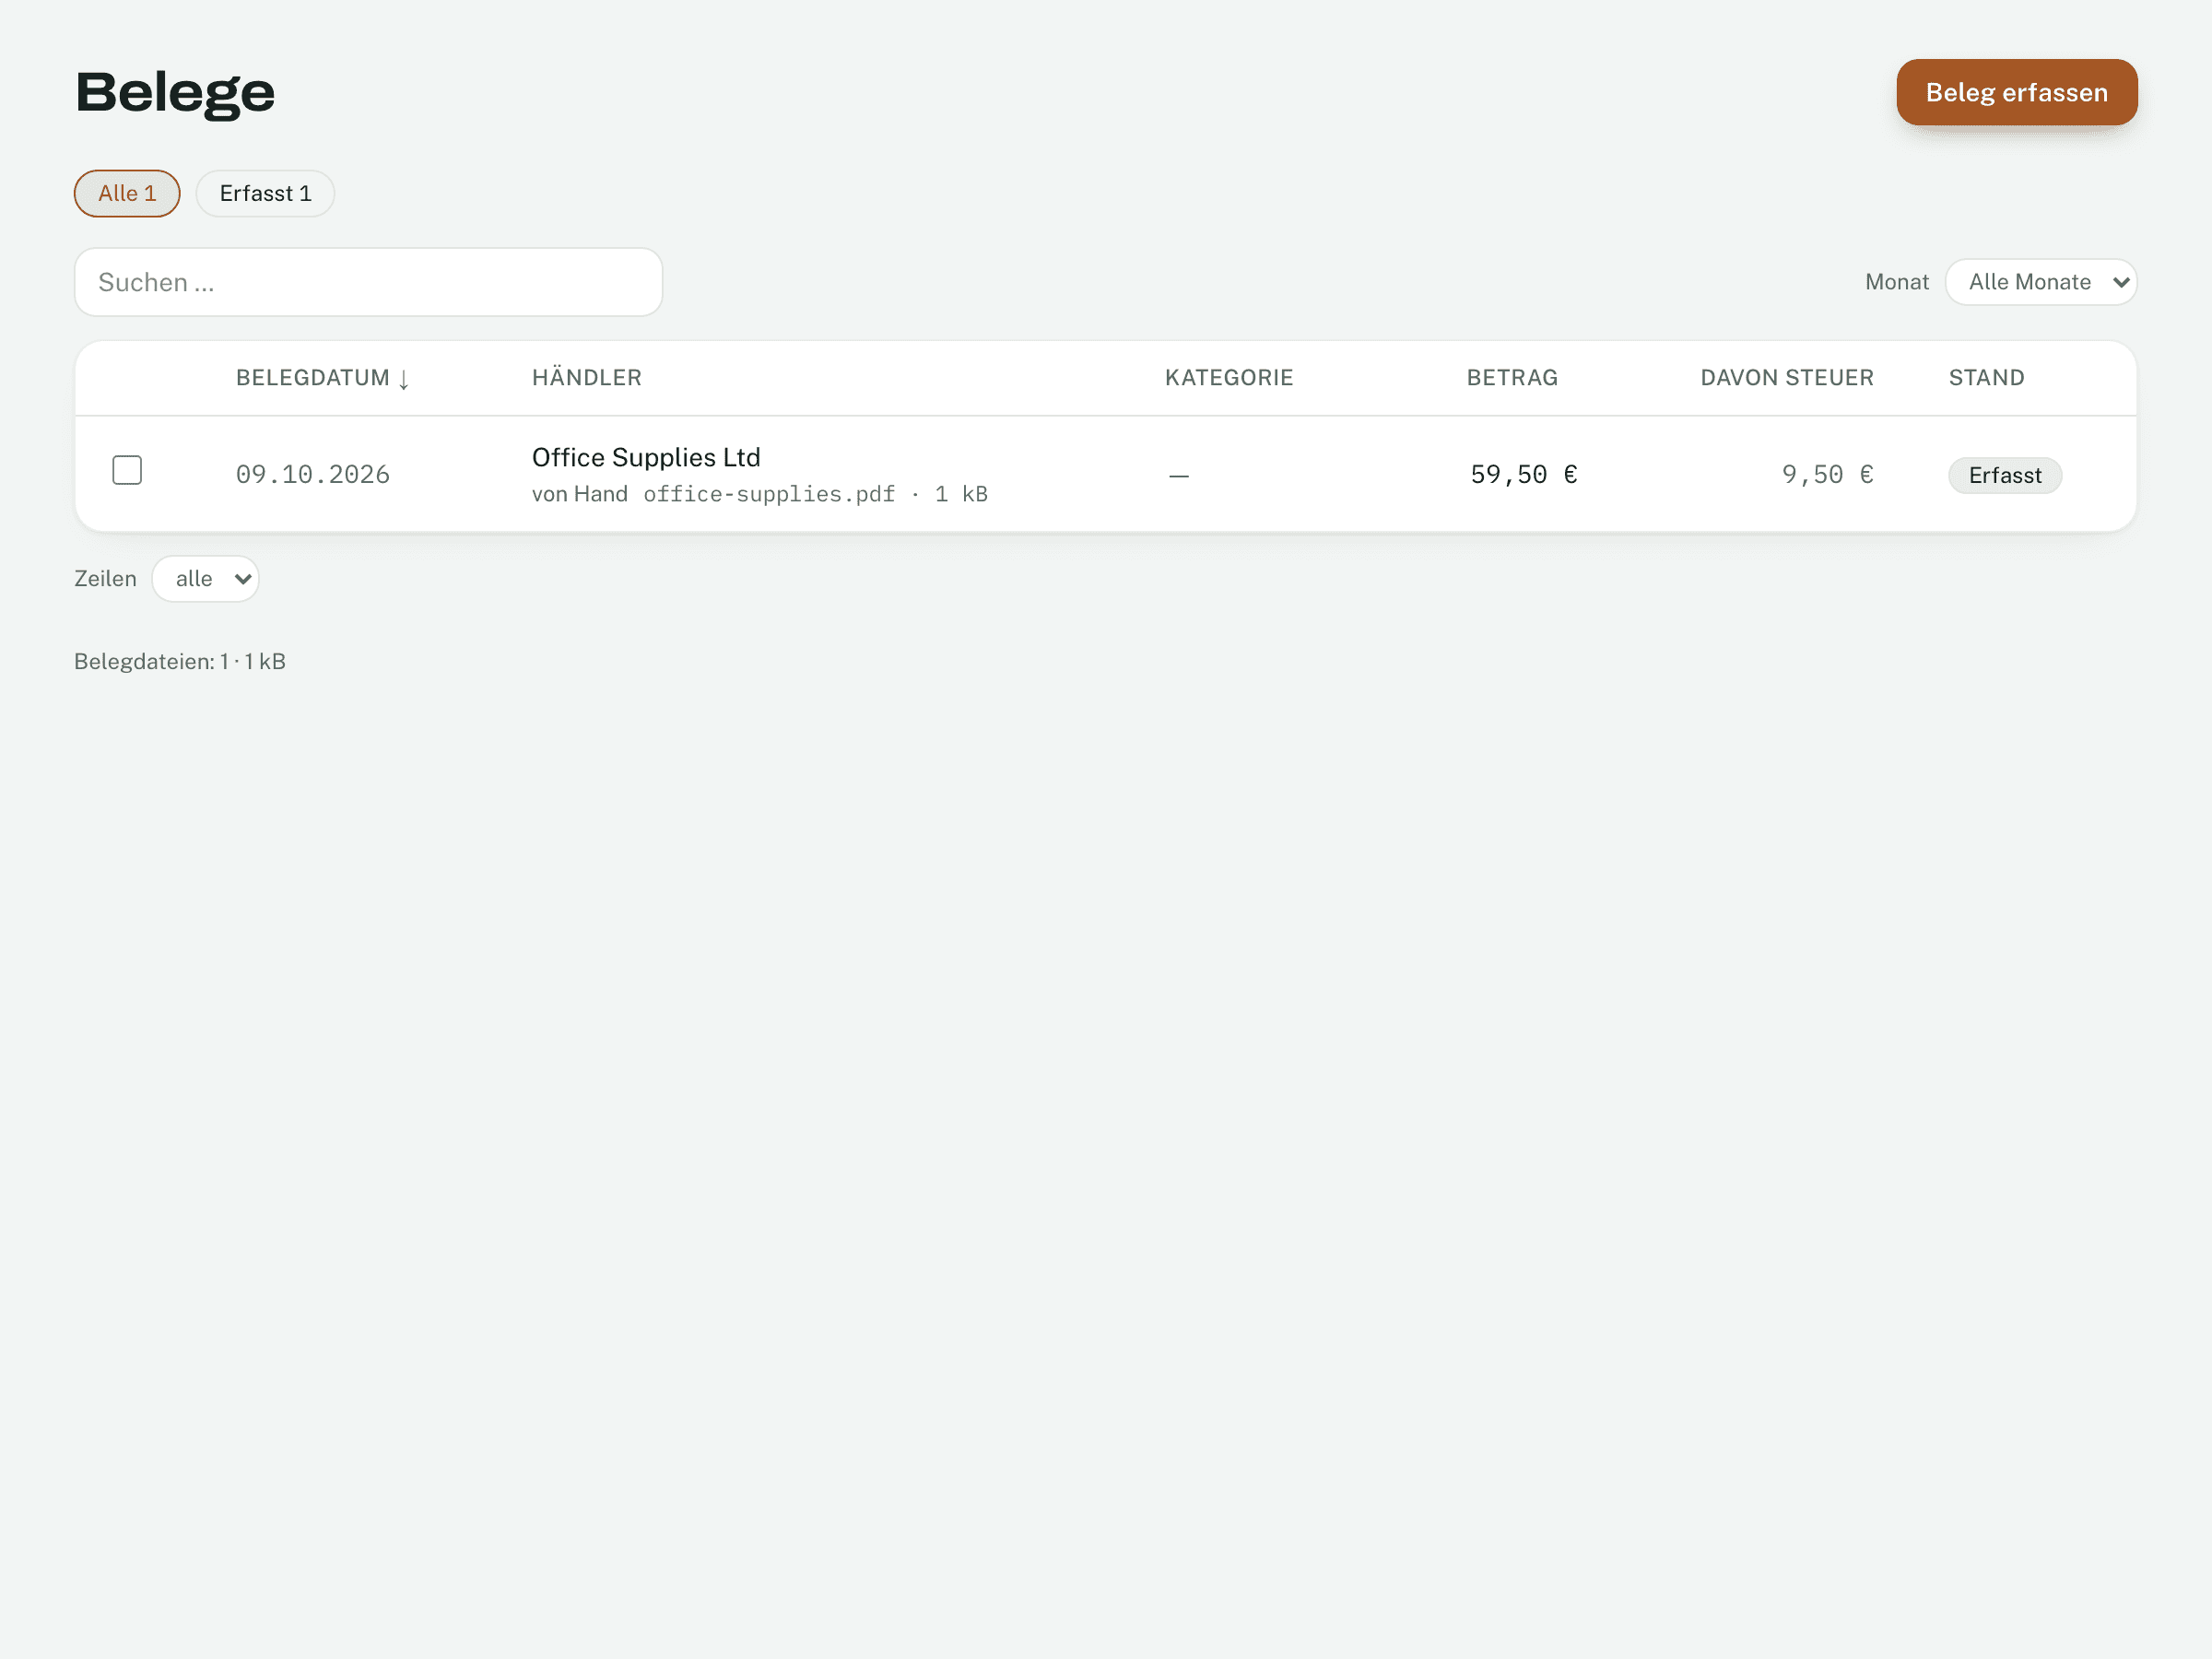
A new receipt is a draft. Check the details and click Confirm. It needs a receipt date and an amount.
Only confirmed receipts count for input VAT, the returns and the reconciliation.
- New — a file is there, nothing has been read yet.
- Analysed — read or typed in, but not yet confirmed.
- Confirmed — confirmed, but not yet matched to a bank line.
- Matched — confirmed and linked to the payment on the bank statement.
- Discarded — sorted out with Not a receipt.
At the top of the list is what you still need to look at. On an open receipt, Next steps through all open ones.
Reading automatically
Invobookz can read merchant, date, amounts, VAT rates and category from the receipt. You allow this once: Settings → Documents → Receipt reading → Allow automatic reading. The receipts are sent to an AI service in the USA (the provider is named on the page); you can withdraw your consent at any time.
- Receipts from the scan app and the receipt inbox are read straight away. On the computer you click Read it — this overwrites what you have already entered.
- What the reading was unsure about is marked read with doubt.
- With Confirm receipts without asking, Invobookz confirms by itself above a certainty of 80–100 %. It is off by default.
- How many readings per month are included depends on your plan; regardless of that, it stops at 100 per day.
The receipt inbox
- Open Settings → Documents → Receipt inbox and click Set up address.
- Send receipts as attachments to this address — or auto-forward invoice emails from your mailbox to it.
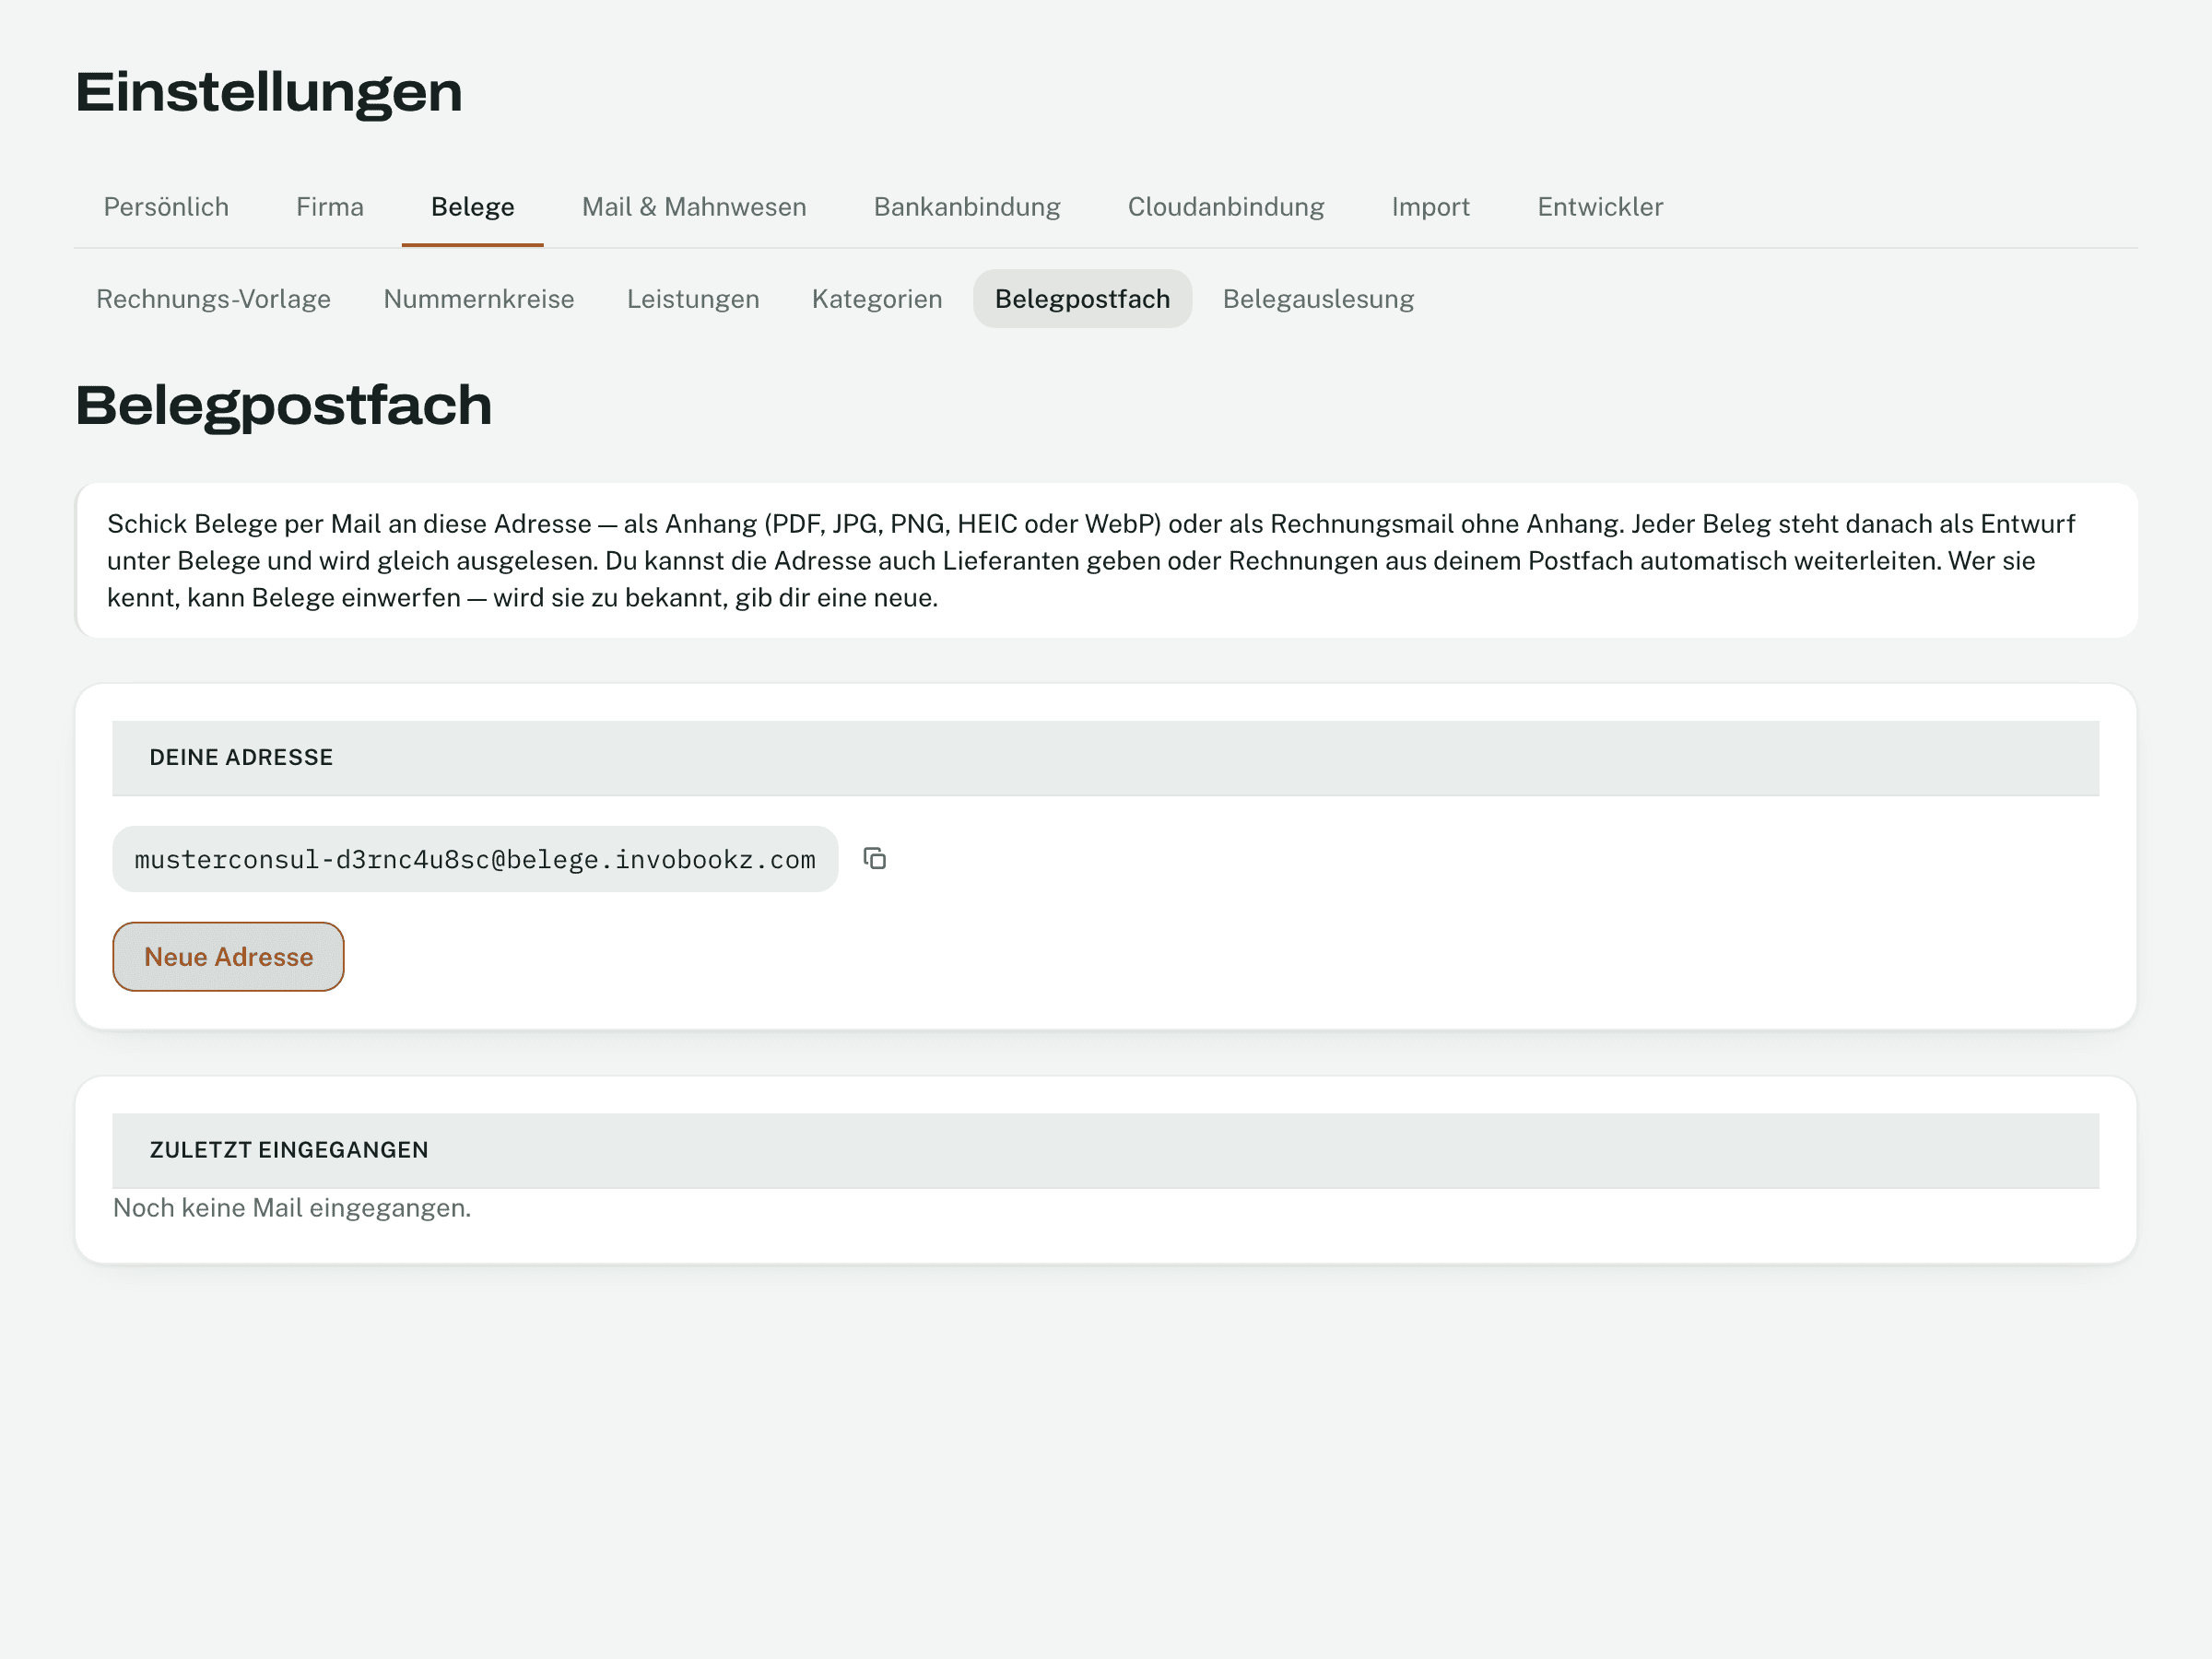
- Every attachment becomes a draft under Receipts. Up to 20 attachments per email; signature images are skipped.
- An invoice email without an attachment becomes a PDF receipt.
- What was not accepted is listed with the reason under Recently received.
- Anyone who knows the address can drop receipts in. If it becomes too widely known, get a new one with New address — the old one then accepts nothing.
With your phone: scan.invobookz.com
- Open scan.invobookz.com and sign in with your usual account.
- Photograph receipt — or Image or PDF from this device. Another page of this receipt adds more pages.
- This receipt is complete — check it: Invobookz reads it, you check and save. Saved in the scanner, the receipt is confirmed straight away.
The scanner can only create receipts — signing in on your phone does not put full access in your pocket.
Suppliers and categories
- Suppliers are built from your receipts. In a supplier’s file you set whether they are always reverse charge, and a default category — it only fills an empty category field.
- Settings → Documents → Categories: 25 built-in ones in groups. Add your own with +; a description helps the reading choose. Built-in ones can be hidden, your own deleted as long as no receipt uses them.
Not found what you are looking for? In Invobookz, click Support at the bottom left — we answer in the app.