Create your account and try it for 14 days
From the first form to the trial: what you enter, what happens next and what you choose along the way.
Last checked against the program: 09/10/2026
The form
Open app.invobookz.com/register — or click the trial button on the start page.
- Your access: your name, your email address and a password. The password needs at least 12 characters; digits or special characters are not required — a long sentence is safer than a short puzzle.
- Your company: company name, street, no., post code, town and country. The address will appear on your invoices; you can change it at any time.
- VAT number (if you have one): with country prefix, for example CY12345678X. The prefix must match the chosen country.
- Plan: Starter or Premium, monthly or yearly (two months free). You can switch later.
- Read the terms, tick the box and click Create account.
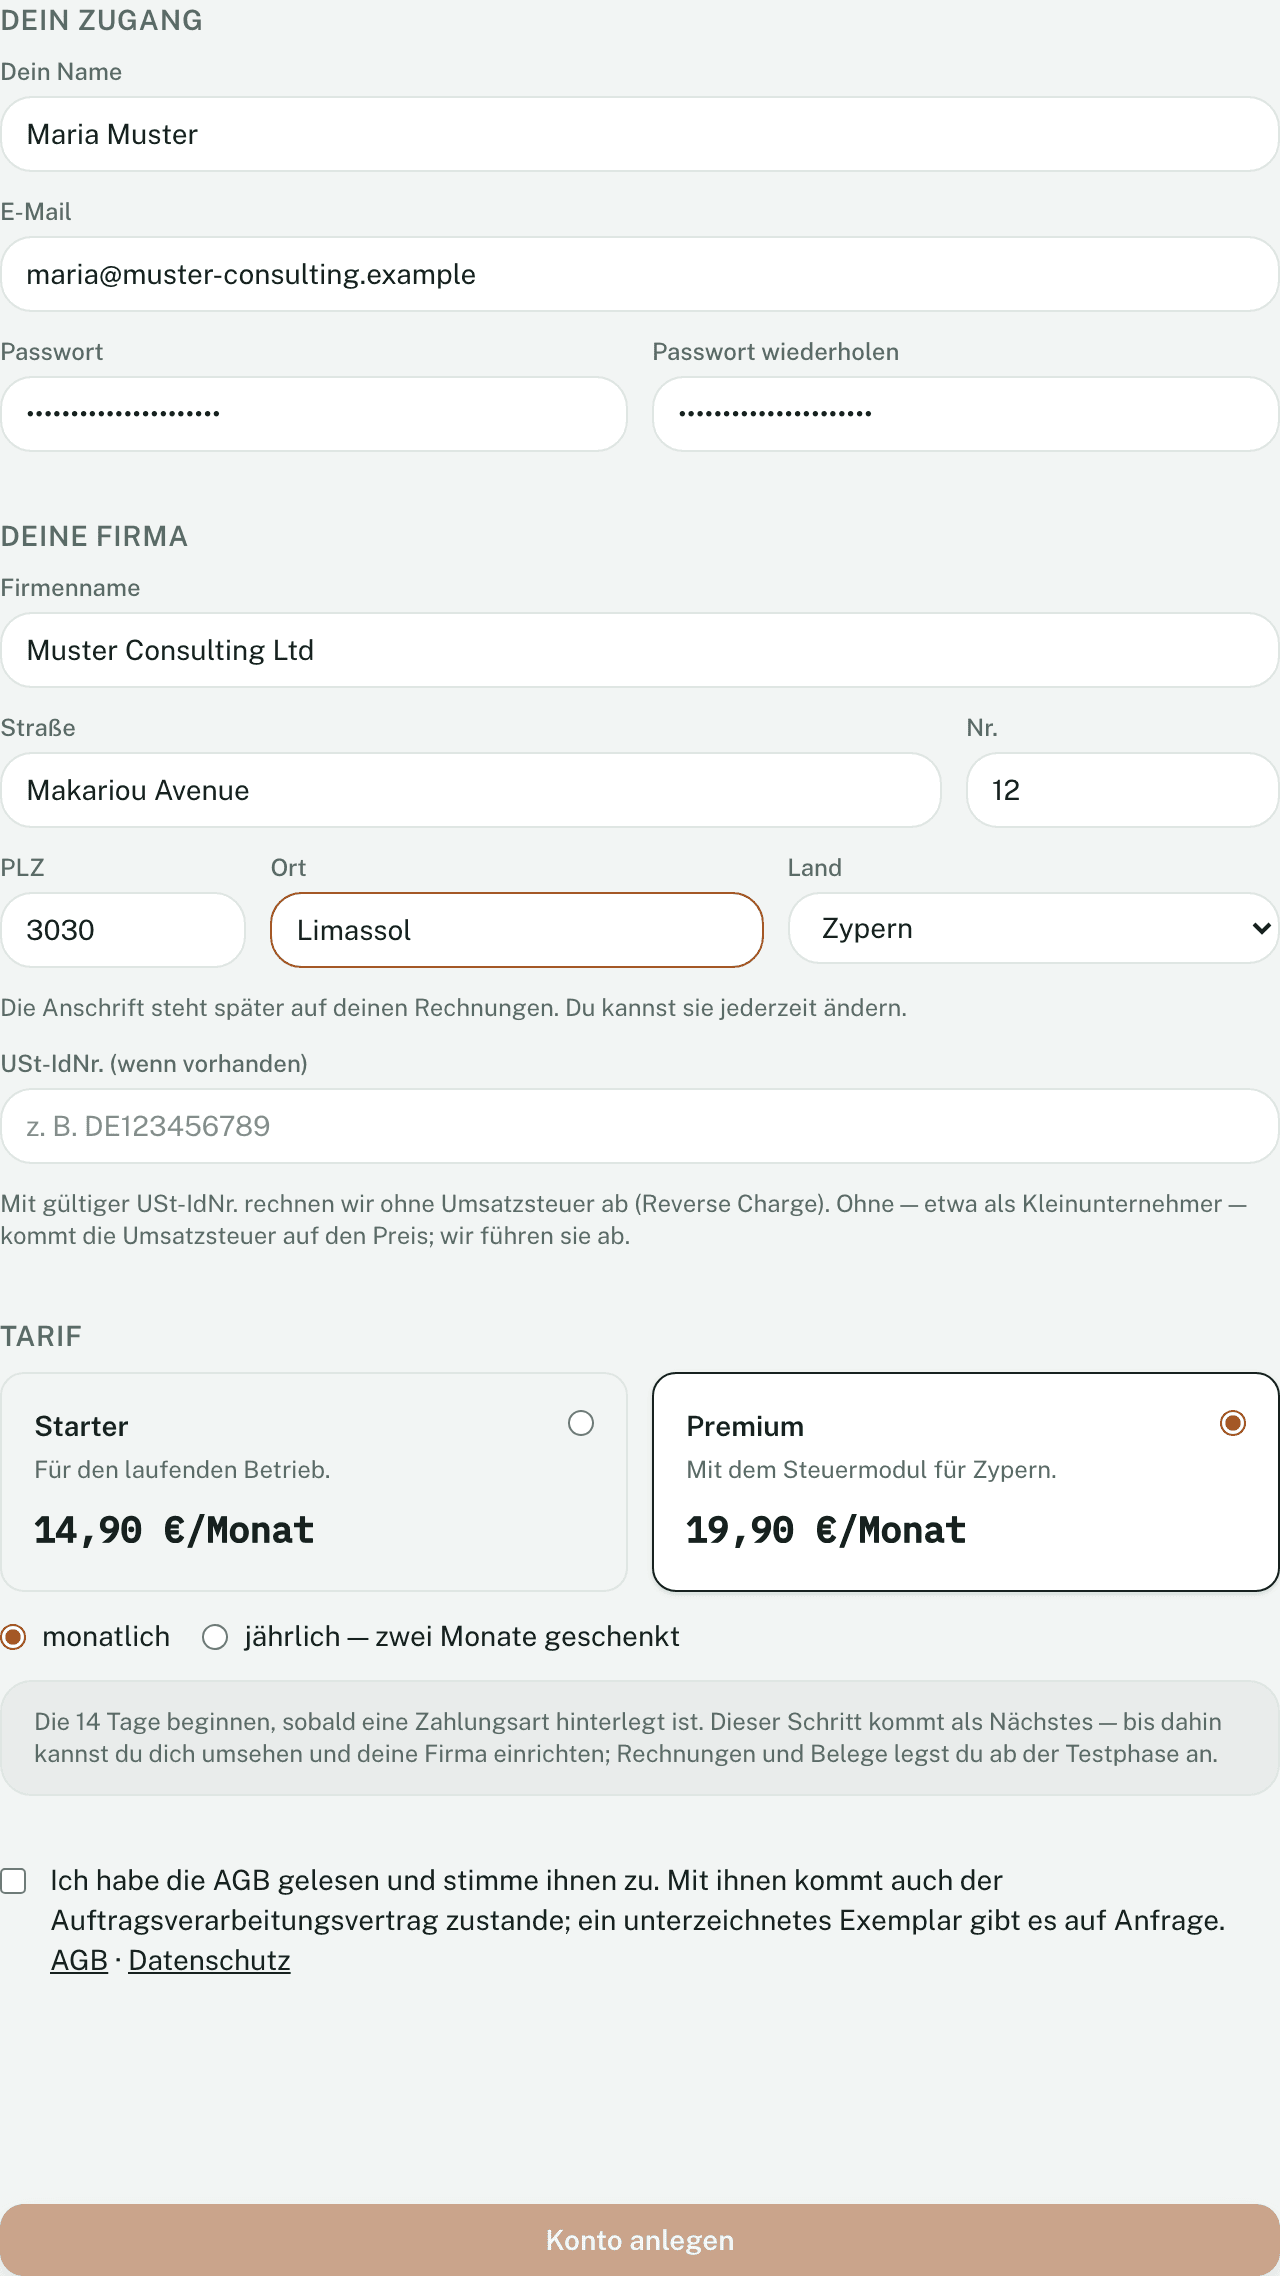
There is no confirmation email: you are signed in straight away, and your company details count as confirmed.
Start the trial
After creating the account you land in Settings → Business → Subscription. The plan you chose is already selected.
- Check the plan and billing period.
- Click Try it for 14 days.
- You land at Stripe and add a payment method. Nothing is charged for 14 days.
- Back in Invobookz, your subscription shows as Trial.
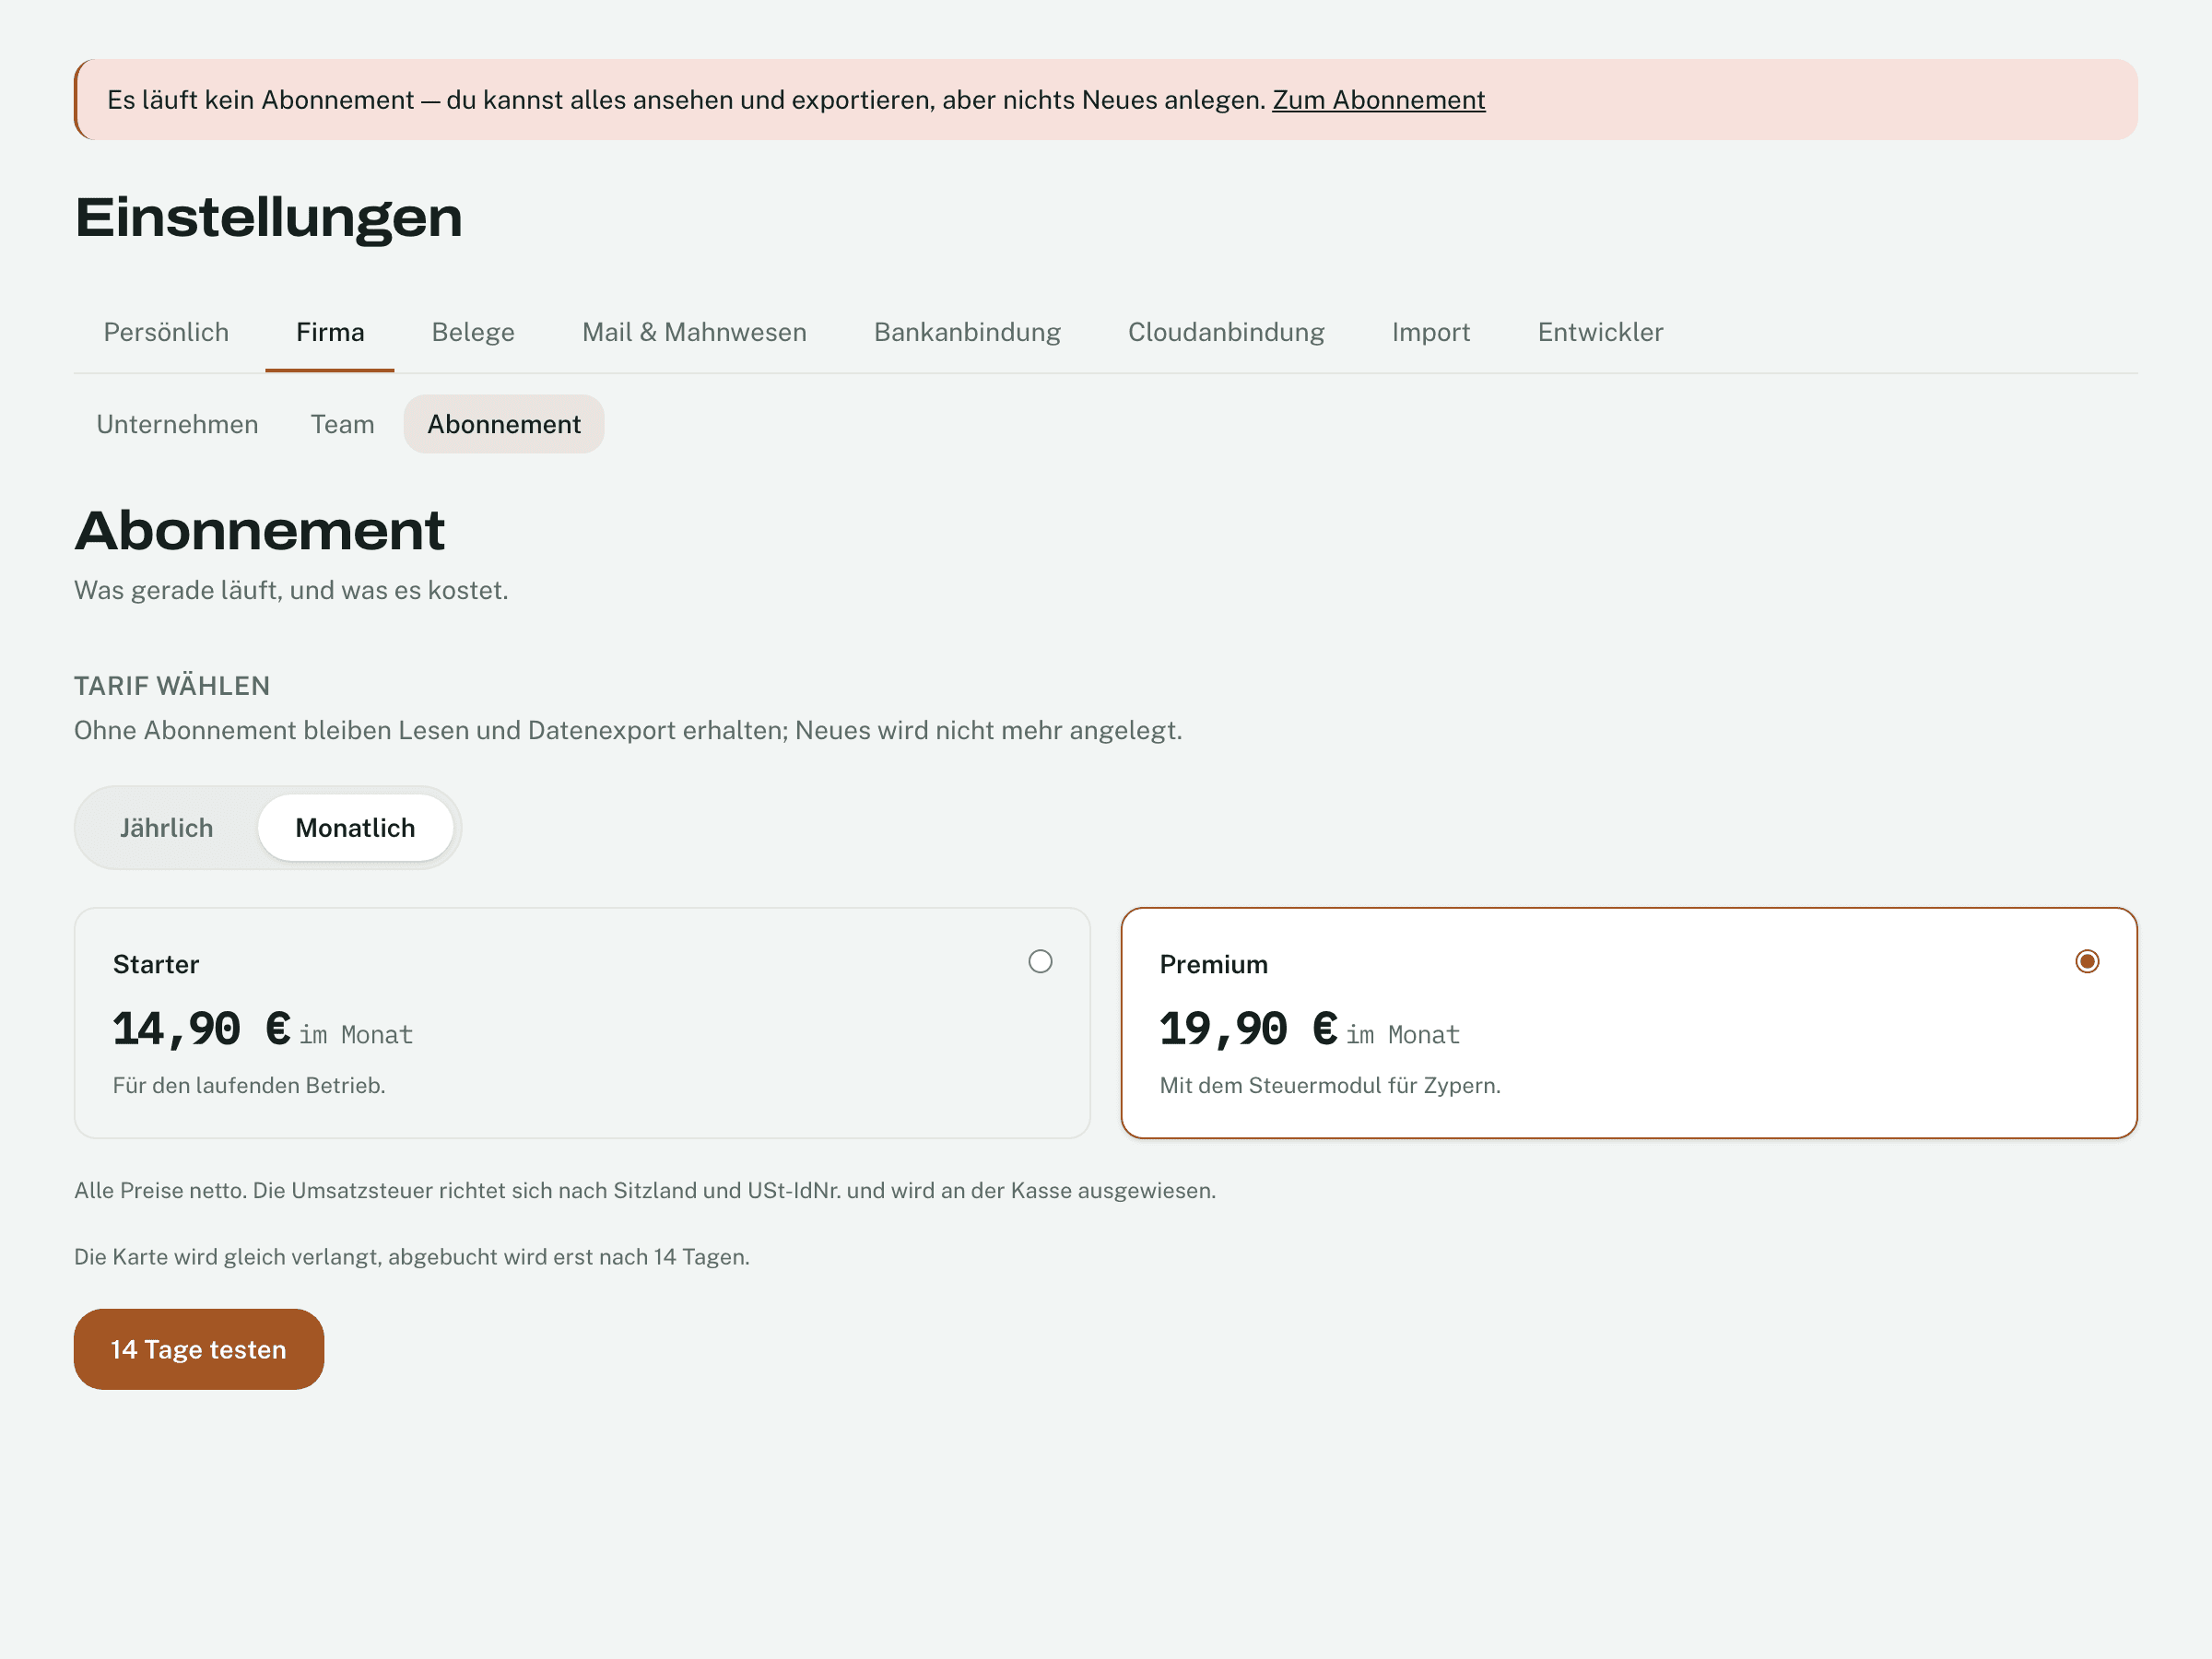
The 14 days only start once a payment method is added. Until then you can look around and set up your company; invoices and receipts come with the trial. Each company gets the trial once.
What comes next
- During the trial, the plan you chose applies — with everything it includes.
- After 14 days the subscription continues and is charged. You can cancel at any time under Settings → Business → Subscription → Manage subscription.
- If the subscription ends, reading and data export remain available — nothing new can be created then. Your data belongs to you.
- What the plans cost and what they include is on invobookz.com under Pricing. All prices are net.
Next step
Set up your company: check your company details and add your bank details. A first service type “Services” and your sender address are already in place — have a look at them. See “Setting up your company”.
Not found what you are looking for? In Invobookz, click Support at the bottom left — we answer in the app.